We participate in the Bulletproof Fitness Equipment affiliate program and may earn a commission from qualifying purchases made through links on this page.
What pulled me toward Bulletproof Fitness Equipment was not one attachment. It was the idea that one rack or upright could become several different training stations without filling a room with dedicated machines.
I own the VTS, VTS Launch Pad, Isolator, ISO Arms, 360 Bearing Handles, 3D Handles, a Lock-N-Float leg setup, seat/stand components, a rack-mounted seat support, and the Crossbow Cam. For products I do not own, this guide relies on Bulletproof’s current published specifications and setup documentation, checked on September 20, 2026. I am not treating manufacturer marketing claims as independent testing.
That distinction matters because Bulletproof is not a normal “buy one machine and leave it alone” equipment line.
The ecosystem is modular. A rack can become a Smith-style station. The same uprights can support cable work. The Isolator can cover leg extensions, curls, arm work and other rotary movements. The VTS can accept handles and other attachments. The Launch Pad adds leg-press and calf-training options. The VBS creates a dedicated belt-squat station. Direct Flight adds cable-cam fly, rear-delt and lateral-raise patterns.
The benefit is capability density. The cost is configuration time.
If you want every exercise permanently staged and ready immediately, separate commercial machines are simpler. If you have limited floor space and do not mind moving attachments, changing cable paths, repositioning a bench, or setting hardware between movements, the equation changes.
You are trading permanent machine footprints for setup time. That is the central idea of this guide.
Browse the current VTS lineup on Bulletproof’s site.
Bulletproof Ecosystem at a Glance
VTS
What it does: Guided vertical Smith-style trolley platform with the broadest VTS attachment capability
What it needs: Compatible rack uprights, barbell or compatible handles, safety stops
Check first: Upright size, rack width, bar compatibility, anchoring
VTS Lite
What it does: Lighter Smith-style trolley system with High/Low cable integration
What it needs: Compatible rack and barbell
Check first: Rack width, hole/hook setup, whether you need unilateral/opposing-load capability
VTS Lite HOME
What it does: Lowest-cost Smith-focused trolley
What it needs: Compatible rack and barbell
Check first: Whether you will later want High/Low cable integration or advanced VTS attachments
VTS Launch Pad
What it does: Converts VTS/VTS Lite into a leg-press/calf platform
What it needs: VTS or VTS Lite
Check first: Current included hook configuration, rack clearance, safe setup
Isolator
What it does: Rotary lever platform for leg, arm, hip and other machine-style movements
What it needs: Compatible upright or stand plus movement-specific attachments
Check first: Upright size, hole size, seat support, attachment interface
Lock-N-Float
What it does: Isolator lever-arm platform for lower- and upper-body add-ons
What it needs: Isolator
Check first: Which add-ons you actually need
High/Low Pulley
What it does: Rack-mounted cable station; one side per unit
What it needs: Compatible rack plus VTS/VTS Lite or another supported load-source path
Check first: Left/right side, rack fit, cable travel, load source
VBS
What it does: Dedicated vertically loaded belt-squat platform with lockable/articulating hip movement
What it needs: Wall-mounted installation or supported mounting solution
Check first: Installation location, starting resistance, current availability
Direct Flight
What it does: Dual-cam fly/rear-delt/lateral-raise style platform
What it needs: 3×3 rack-face mount or VTS/VTS Lite integration plus cable resistance source
Check first: Upright/hole compatibility and cable alignment
Handles
What it does: Change the interface and movement freedom of VTS/ISO Arms
What it needs: Correct latch, hex, dual-hex, or telescopic interface
Check first: Exact interface; “Bulletproof compatible” does not mean universal
The Simplest Way to Understand the System
The catalog looks complicated because the same few structural ideas appear in many combinations. Think in four layers.
1. Foundation — This is what physically holds everything: power rack, wall-mounted upright, Solo Stand, Mini Isolator Stand, Tri-Post or another compatible structural base.
2. Movement platform — This determines how the load moves: VTS = vertical guided movement; Isolator = rotary lever movement; VBS = vertical belt-squat loading with optional hip articulation; Direct Flight = cable-cam independent-arm movement.
3. Resistance source — This is what supplies the load: plates on a bar or horn, VTS trolley, plate-loaded weight-horn trolley, cable stack, supported digital resistance source, or another manufacturer-documented cable source.
4. Interface — This is what connects the user to the movement: barbell, handles, pads, footplates, cams, cables, pulleys, belts, hooks and latches.
Once those four layers are separated, the ecosystem becomes much easier to plan.
Section 1 — VTS: The Guided Vertical Platform
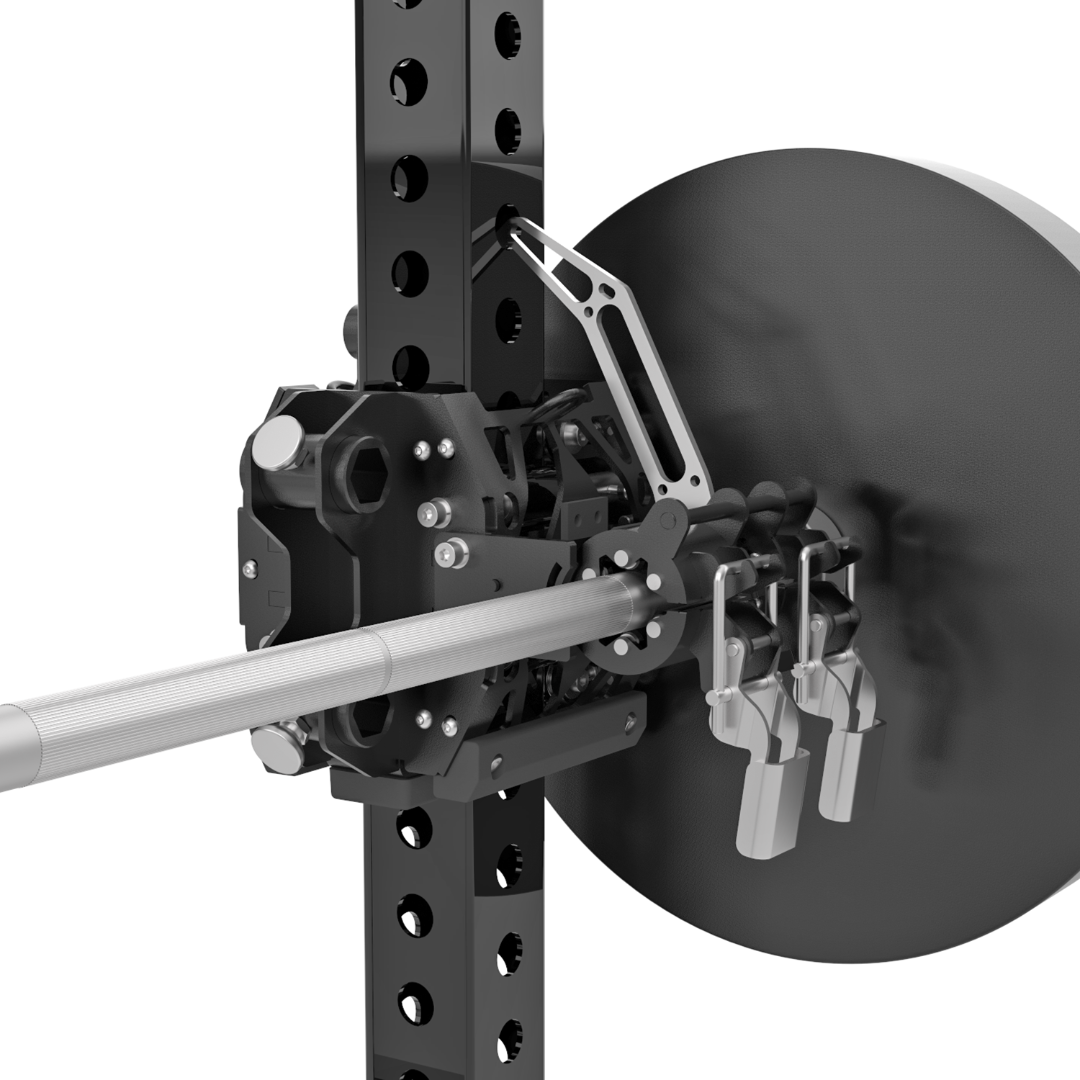
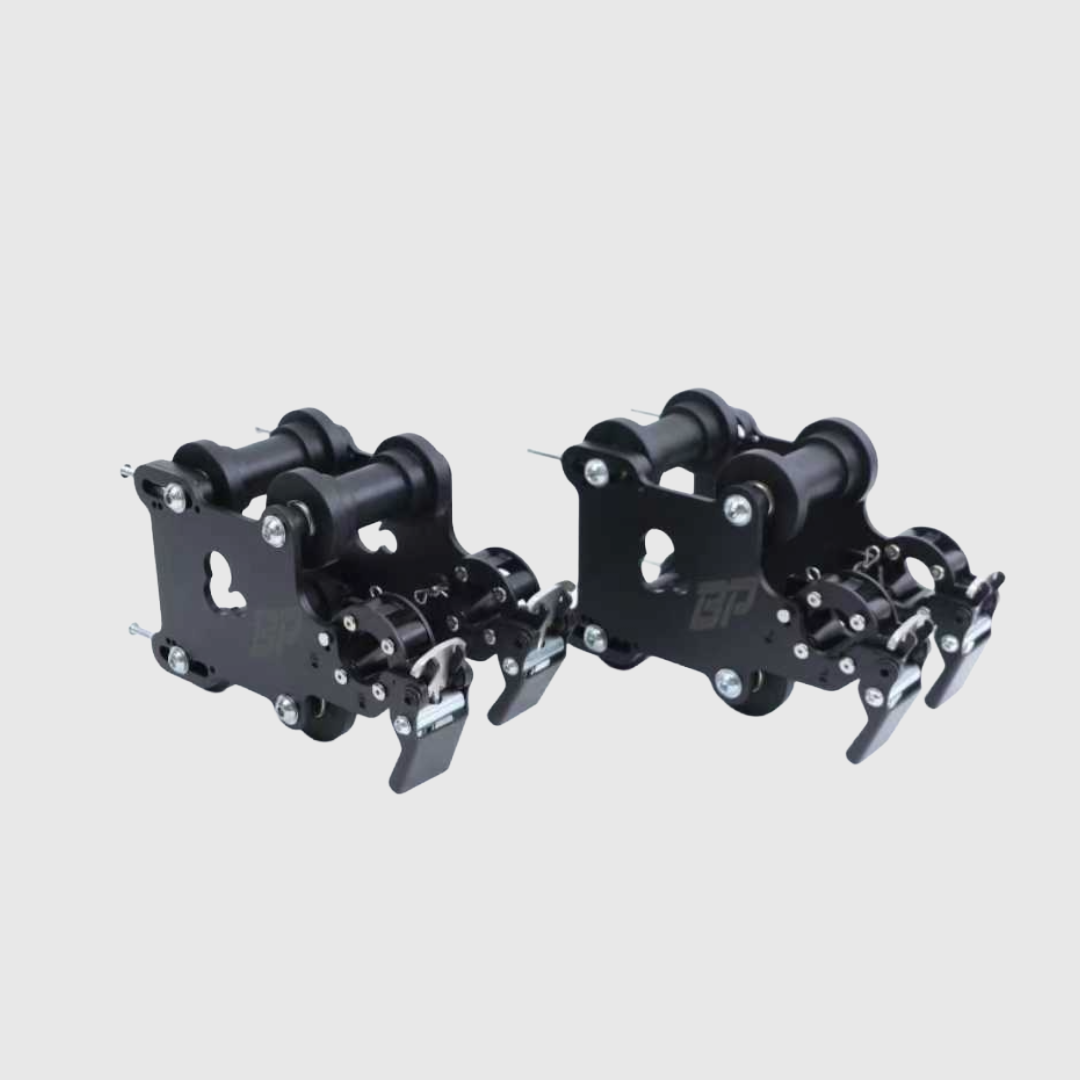
The VTS is the piece that makes the entire Bulletproof system easiest to visualize. It rides vertically on compatible rack uprights and uses your rack as the guide structure. In its standard configuration, it turns a conventional rack into a Smith-style station.
Bulletproof’s current full VTS uses an all-sided roller layout, with the manufacturer positioning it for unilateral, iso-lateral and more complex opposing-load configurations. VTS Lite uses a simpler two-sided roller system and is positioned primarily around Smith-style training and basic functional-trainer use. VTS Lite HOME strips the idea down further for buyers who mainly want the guided-bar function.
That sounds like a minor product-tier difference, but it changes the long-term build. If you want only guided squats, presses, hinges and calf raises, HOME may cover the core need. If you want a Smith station plus High/Low cable integration later, VTS Lite is the more logical starting point because Bulletproof currently includes the necessary hex-port integration on Lite and explicitly omits it from HOME. If you want the trolley itself to become a broader attachment platform — with more unilateral and iso-lateral options — the full VTS is the most expandable of the three. For the full side-by-side breakdown, see VTS vs VTS Lite vs VTS Lite HOME.
The full VTS is currently documented for compatible 3×3, 2×3 and 2×2 uprights, and Bulletproof says its standard VTS configuration has been tested up to a 43-inch inside rack width with a 7-foot Olympic barbell. VTS Lite carries the same published maximum tested inside width. That is exactly the kind of compatibility detail that should be checked before ordering rather than assumed from the phrase “3×3 rack.”
Use the Rack Compatibility Builder to check your fit.
Also see our Power Rack Buying Guide, why 3×3 racks are the standard, and 5/8-inch vs 1-inch rack hardware.
The Launch Pad Changes What VTS Can Do
The VTS Launch Pad is a current Bulletproof VTS/VTS Lite attachment that turns the trolley pair into a leg-press and calf-training platform.
Bulletproof’s current page lists a 31.5-inch-wide platform, approximately 40 pounds of net weight and a 350-pound maximum load capacity. It includes a pair of hitch hooks, safety pins and a padded cushion; optional weight horns can add plate-loading options.
The important point is not the number. It is the category of movement. VTS is no longer only “a Smith machine on your rack.” With the Launch Pad, the same vertical trolley architecture can be configured around leg pressing and calf work as well. That strengthens the small-space case because a user can add another machine pattern without buying another frame.
See the full VTS Launch Pad Guide for specs, what’s included, and setup, or shop the current VTS Launch Pad.
Section 2 — Isolator: The Rotary Machine Platform
VTS handles linear vertical motion. The Isolator solves a different problem: rotary, joint-centered movement. That distinction is why the two products complement each other instead of replacing each other.
The Isolator can be configured for movements such as leg extensions, leg curls, preacher curls, triceps work, hip movements and other lever-based patterns depending on the arm, pad, seat and resistance setup. The Isolator also acts as a host for a growing number of attachments rather than being one fixed machine.
The Lock-N-Float platform is one of the clearest examples. Bulletproof currently describes the Lock-N-Float Center Mount Lever Arm as the required base, with leg pads purchasable separately through the same hex-port interface as standard Isolator pads. The leg-pad configuration turns that arm into a lower-body station for leg-extension and leg-curl patterns. See the full Lock-N-Float Guide.
Seat support matters in real use because a rotary leg station is only as useful as the body support around it. Bulletproof currently sells the Isolator Seat Spotter for rack-mounted support, plus other stand and support options depending on the layout. See the full Isolator Seat Support Guide for the Seat Spotter vs. Kickstand decision.
The Isolator is also where Bulletproof’s cam ecosystem becomes important. The standard Isolator Cam is positioned by Bulletproof for direct cable systems and moderate-to-lighter resistance needs. The Crossbow Cam is positioned for setups where pulley mechanics reduce felt load and for users who want stronger leverage recovery or hybrid plate-plus-cable loading. See Isolator Cam vs Crossbow Cam for the full comparison.
Browse the current Isolator lineup.
Section 3 — High/Low Pulley: Turning the Rack Into a Cable Station
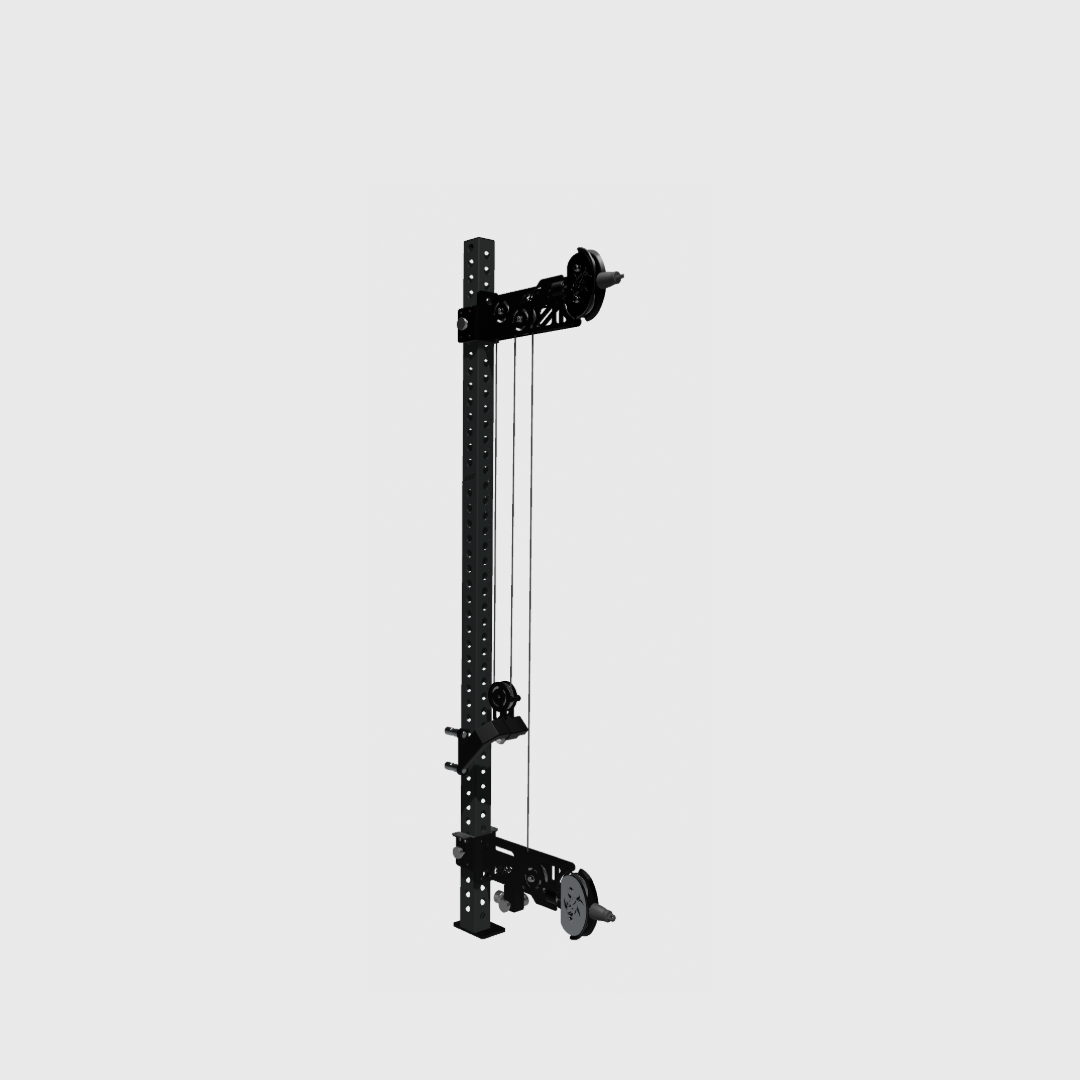
The High/Low Pulley System may be the piece that most clearly demonstrates why a modular rack can replace several permanent footprints. Bulletproof sells the system as a single-side rack attachment with left and right configurations.
The current product page documents aluminum pulleys with sealed bearings, swiveling front pulleys, high-to-low cable travel, a full-resistance mode and a reduced-force longer-travel mode, VTS and VTS Lite integration, a very small rear projection, and rack mounting on compatible uprights.
If you install one unit on each side of a compatible rack and use a VTS or VTS Lite pair as independent moving load sources, you can build two separate cable sides around the rack. That gives you the architecture of a dual functional trainer without another freestanding frame.
The important caveat is convenience. This is not automatically the same user experience as a commercial selectorized dual-stack machine. A VTS-based system has trolley starting mass, requires plate changes when plate-loaded, and uses a modular cable path. Those tradeoffs should be understood before treating “functional trainer” as meaning identical workflow.
The benefit is that the rack can now support presses, flyes, rows, curls, triceps work, lateral raises, face pulls, rotations and many other cable patterns while remaining the same central structure used for barbell and VTS training. VTS Lite HOME is the critical exception: Bulletproof explicitly says HOME does not include the hex ports needed for the Hi-Lo cable system.
Use the Cable Pulley Ratio Calculator when planning cable feel and travel, and see our guide to cable attachments for hypertrophy.
See the current High/Low Pulley System product page.
Section 4 — VBS: A Dedicated Belt-Squat Platform
The VBS is more specialized than the VTS or Isolator. Instead of borrowing rack motion for another job, it is built around a vertical belt-squat load path.
Bulletproof currently documents two movement behaviors: a locked mode that keeps the hip interface in a strict vertical path, and an articulating mode that allows horizontal hip movement while the load still travels vertically. That distinction matters because some lifters prefer a highly constrained belt-squat path while others want room to self-organize their hip position.
The current manufacturer page lists an unloaded starting resistance of 83 pounds and offers an optional Lift Assist that Bulletproof says can reduce the starting resistance by about 30 pounds. The VBS also folds toward the wall when stored, which fits the broader theme of this ecosystem: equipment can occupy a smaller permanent footprint if the user accepts some setup and configuration.
Inventory on newer Bulletproof products can move between normal stock, preorder and backorder. For that reason, this guide does not treat a shipping date as evergreen. Check the live product page before planning a build around a specific delivery window.
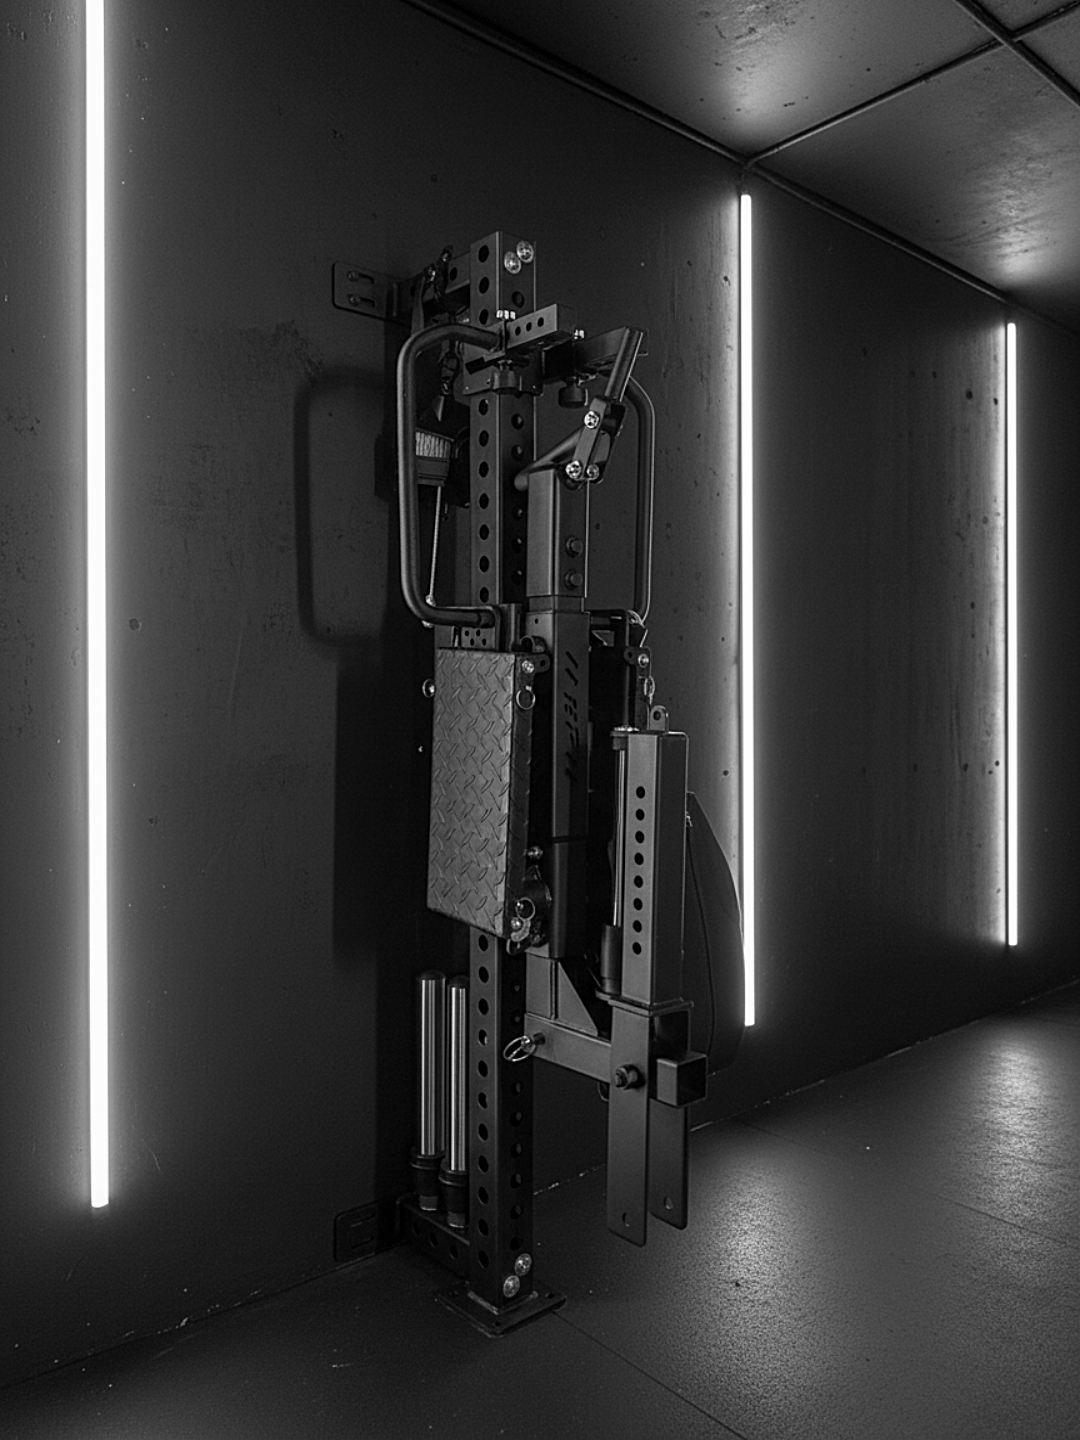
See the current VBS Vertical Belt Squat System product page.
Section 5 — Direct Flight: Machine Fly and Delt Patterns Without a Full Pec Deck
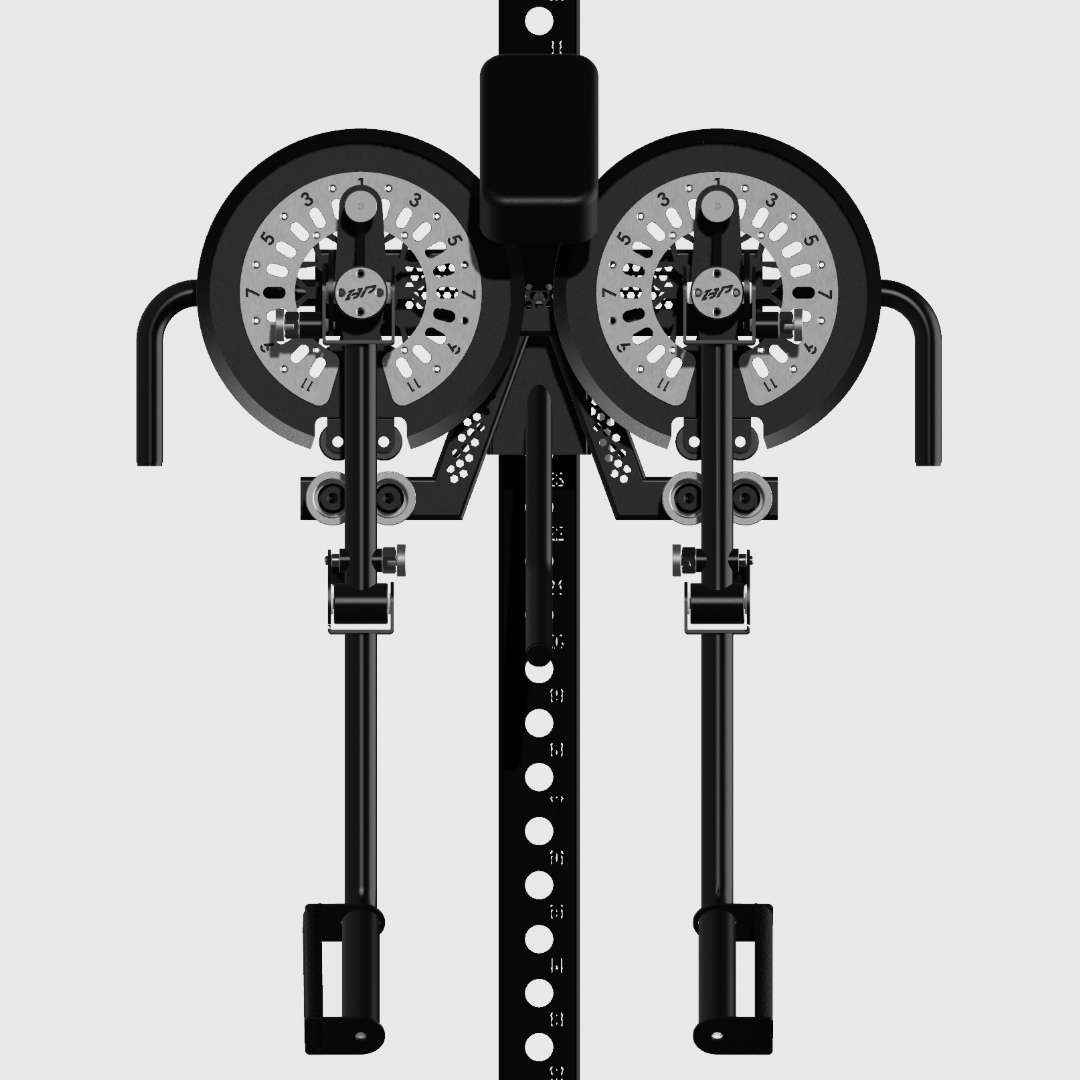
Direct Flight fills another gap: cable-cam fly, rear-delt and lateral-raise style training.
Bulletproof currently documents rack-face mounting on 3×3 uprights with either 1-inch or 5/8-inch holes. It can also integrate with VTS and VTS Lite from the front through the Mini Barbell.
The system requires a compatible resistance source. Bulletproof currently offers two broad paths: a dedicated Hinge & Pin Load Trolley if you do not already have a suitable cable load source, or a Floating Pulley connection if you already have VTS, a compatible functional trainer, REP Ares, Voltra or another supported source.
Bulletproof also publishes a useful example showing how combined pulley mechanics can reduce felt load dramatically on a REP Ares setup. That example is a reminder that cable geometry matters more than the number printed on a stack.
Direct Flight is not something I would buy before the foundation is settled. It makes more sense after you already know your rack geometry, load source and cable path.
See the current Direct Flight product page.
Section 6 — Handles Are Their Own Ecosystem
Bulletproof’s handles are easy to misunderstand because several of them look like they solve the same problem. They do not use one universal connection.
Current interface families include full-VTS barbell-latch handles, VTS hexport handles, dual-small-hex handles used with systems such as ISO Arms and some VTS configurations, VTS telescopic-tube handle systems, and specialized articulated handles.
- ISO Handles Attachment: Bulletproof currently limits these to the full VTS barbell-latch system and explicitly excludes VTS Lite and VTS Lite HOME.
- Hexport ISO Handles: These mount through VTS hexports rather than the traditional barbell latch.
- 360 Bearing Handles: Currently designed primarily around VTS and use a telescopic system with lockable or free-spinning rotation.
- 3D Handles: Use their own adjustable geometry with telescoping width and dual articulation. Bulletproof currently says they are optimized for ISO Arms and VTS — not the same interface as the 360 system.
- Adjustable Handles: Use a dual-small-hex system. ISO Arms unlock their full adjustability; VTS can use them with different orientation behavior. They do not fit the Isolator’s large single hex port.
- Row Handles: Use dual hex posts and are currently documented for ISO Arms and VTS.
- Swivel Handles: Currently drop into the VTS barbell latch and articulate during pressing, pulling and arm work.
That is why “Bulletproof compatible” is not enough information. You need the exact interface — see the full Handle Compatibility Guide.
Browse the current Bulletproof handle collection.
Section 7 — Build Scenarios
Scenario 1: One Rack, Smith Training First
Start with VTS Lite HOME if the goal is primarily guided squats, presses, hinges and calf work and you do not expect the trolley to become a cable or handle platform. Choose VTS Lite instead if there is a serious chance you will add the High/Low Pulley system later. Choose full VTS if unilateral, iso-lateral and broader attachment use are already part of the plan.
Scenario 2: One Rack, Smith + Dual Cables
Use VTS or VTS Lite plus one High/Low unit on each side. This produces two independent cable sides while keeping the rack as the main structure. The key tradeoff is that this is a modular plate/trolley system rather than a permanently staged selectorized machine.
Scenario 3: One Rack, Smith + Leg Machines
Pair VTS with Isolator. Use VTS for guided compound patterns and Isolator for rotary leg-extension/curl and other machine-style work. If leg pressing matters, Launch Pad adds another pattern to the VTS side.
Scenario 4: Maximum Machine Variety
Start with full VTS + Isolator. Then add only the attachments that solve missing movements: High/Low for cable work, Launch Pad for leg press/calf work, Direct Flight for fly/rear-delt/lateral patterns, cam choice based on your cable mechanics, and handle systems based on exact interfaces. The mistake is buying every accessory because it exists — build from missing movement patterns.
Scenario 5: Rack + Wall Belt Squat
Keep the rack focused on VTS/Isolator/cable work and place the VBS against a wall. This uses more than one structure, but it avoids forcing every lower-body pattern through the rack.
Section 8 — Availability and Building in Phases
Bulletproof updates products quickly and sells through batched production runs. That means inventory status can change between normal stock, preorder, backorder and sold out. For a modular ecosystem, that matters because one unavailable component can delay an entire configuration.
Do not build a training plan that depends on every future attachment arriving at once. A better sequence: buy the movement platform that solves your biggest gap, train with the pieces currently available, add handles, cable components, cams and specialty attachments later, and verify live inventory before ordering dependent parts.
This also reduces the chance that you buy an accessory before you fully understand how you want to use the base platform.
Section 9 — The Real Downsides
- Setup time: A dedicated machine wins on speed. A modular rack system asks you to move hardware, adjust positions and sometimes reroute resistance.
- Complexity: The first few weeks can feel like learning equipment architecture instead of simply training.
- Interface fragmentation: Not all handles, cams, trolleys and ports are interchangeable.
- Compatibility: Rack upright size alone is not enough. Width, hole diameter, side-hole availability, bar geometry, cable clearance and anchoring can all matter.
- Starting resistance: Plate-loaded trolleys and large attachments have their own mass. That matters for smaller muscle groups and lighter training.
- Plate changes: A plate-loaded trolley does not offer selectorized-stack convenience.
- Inventory: A multi-part build can be delayed by one backordered component.
- Cost creep: Modularity feels inexpensive one accessory at a time. A complete ecosystem can become a large investment.
Safety: Read Before Building a Custom Configuration
Use only manufacturer-documented cable, pulley and trolley geometry with hardware rated for the intended load. Anchor or firmly mount the rack where the manufacturer requires it — angled cable pulls and lever arms can create tipping forces. Use safety stops with VTS and VTS Lite; Bulletproof explicitly warns that these systems are not designed to be dropped. Do not improvise cable routing around sharp edges, unverified pulley mounts or unrated hardware.
A failed cable, dropped trolley or unstable rack is a real injury hazard. Compatibility tools are informational. Always compare the final setup against the manufacturer’s current dimensions and safety instructions.
Section 10 — Who This Ecosystem Is For
Bulletproof makes the most sense if floor space is limited, you already own or plan to own a compatible rack, you like modular equipment, you are willing to learn setup positions, you value movement variety, and you prefer expanding one structural platform instead of adding many separate machines.
You may be happier with simpler equipment if you hate changing setups, want every exercise permanently staged, need multiple people to have instant transitions, want selectorized weight changes above everything else, or do not want to measure rack geometry or manage attachment compatibility.
Neither approach is automatically better. The question is what resource is more limited in your gym: floor space or patience for setup.
Section 11 — How to Make a Modular Gym Easier to Live With
The system gets much better once repeated configurations are documented. For each setup, record: rack-hole position, trolley height, bench position and angle, handle or pad choice, cable path, cam start position where relevant, and safety-stop position.
Take a photo after you find a configuration you like. Name the setup. Keep related small hardware together. Group exercises that use the same configuration into the same session when practical. That turns setup time from repeated problem-solving into a repeatable checklist.
FAQ
Can VTS turn a rack into a Smith machine?
Yes. That is the core function of VTS, VTS Lite and VTS Lite HOME: guided vertical bar travel on compatible rack uprights.
Can VTS Lite become a functional trainer?
Bulletproof currently documents VTS Lite with hex ports for High/Low Pulley integration. With compatible left and right cable units, the rack can support independent cable sides.
Can VTS Lite HOME use the High/Low Pulley system?
Bulletproof currently says HOME does not include the hex ports needed for that integration.
Does the Launch Pad work with VTS Lite?
Bulletproof currently lists the Launch Pad for both VTS and VTS Lite.
Is the Isolator Cam the same as the Crossbow Cam?
No. Bulletproof positions the standard Isolator Cam around direct cable systems and moderate resistance. Crossbow is designed to recover resistance lost in pulley systems that reduce handle-side load and can also combine cable and plate resistance.
Are all Bulletproof handles interchangeable?
No. The current catalog uses several interfaces: barbell latch, hexport, dual-small-hex, telescopic systems and product-specific connections.
Can the Isolator replace a leg-extension/leg-curl machine?
The Isolator can be configured for those movement patterns with the appropriate lever, pad, seat and resistance setup. The workflow remains modular rather than permanently staged.
Should I buy everything at once?
Usually not. Build around the movement you are missing first. Add the next attachment only after you know what the current setup still cannot do efficiently.
Not Sure What to Add Next?
If you already own part of this ecosystem and are deciding on the next purchase, see Which Bulletproof Attachment Should You Buy Next? — it organizes the whole catalog by missing training function instead of by product name.
Final Take
The strongest reason to look at Bulletproof is not that any single attachment is revolutionary. It is that several different movement systems can share the same structural footprint.
VTS handles guided vertical training. Isolator handles rotary lever work. High/Low adds rack-based cable training. Launch Pad expands the VTS into leg-press and calf patterns. VBS creates a compact belt-squat station. Direct Flight adds cam-driven fly and delt patterns. The handle ecosystem changes how those platforms connect to the body.
For a small home gym, that can be a powerful combination. But the system rewards planning. Measure the rack. Understand the interface. Choose the movement platform first. Treat availability as live information. Use the calculator when cable mechanics matter. And buy the next attachment because it solves a real training gap — not because the catalog makes it look interesting.
Related Guides and Tools
- Cable Pulley Ratio Calculator
- Rack Compatibility Builder
- Power Rack Buying Guide: The Specs That Matter for Muscle Growth
- Cable Attachments for Hypertrophy: Matching Handles to Muscles
- Why 3×3 Steel Racks Are the Standard for Serious Training
- Power Rack Hole Size: 5/8 vs 1 Inch Hardware Compatibility